Friends, I have been hard at work this last week and I am ridiculously excited to share what I've been working on. Christmas is fast approaching and we are trying something new this year. In an effort to enjoy the holiday season more we are determined to be entirely done with our Christmas shopping/gift making by December 1st. We've decided whatever isn't done by the 1st isn't going to happen. We might be a little crazy, but I'm excited to see how this grand experiment goes.
With a December 1st deadline it is major crunch time around here! Last week I hit the DIY Christmas projects hard spending pretty much every free moment making Christmas gifts for my boys. First on the list for them was a car cozy to house the matchbox cars we got them for Christmas.
This sweet little car cozy by Homemade by Jill seemed perfect and I actually made one a few weeks ago.

{Click on the picture to go to her fabulous tutorial and generally fabulous blog}
Instead of doing a simple applique on the front I hot glued a whole street system with a few buildings on it which turned out cute! But I just wasn't thrilled with it. The denim+canvas made for a really bulky combination that for me, a very average seamstress, was hard to sew. I found myself not looking forward to making a second one (with twins we do everything by twos in this household) and it kept getting bumped to the bottom of my list.
So I decided to hit the internet up for some more inspiration and I came across this
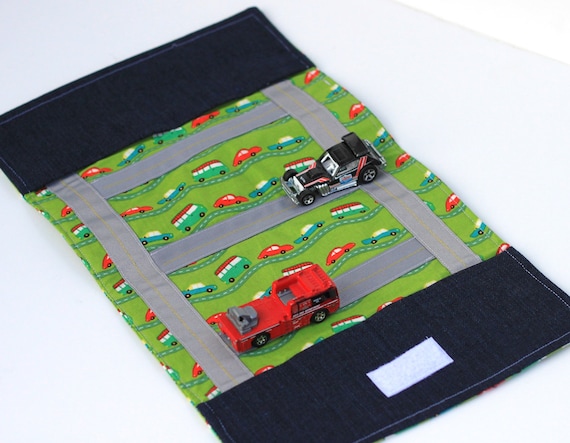
{Click on the picture for a link to her etsy shop where you can buy the pattern or the mat itself}
I loved that it folded up and seemed so much less bulky! But I wanted a road system that was a little more fun/intricate. Armed with some new inspiration I set out to make my own version of the car cozy that would have everything I wanted. They are far from perfect, but I am so thrilled with how they turned out!
(Prepare yourself for picture overload)
Portable felt car mat #1
Side One: I decided to do a race track on one side along with the pockets that hold the cars.

I wanted to spice it up a little bit so I put colored parking spaces in the middle of the race track. I figure it's good practice for the boys to work on their colors ("put a car on the green spot." etc) plus it added some visual interest (the white strip is velcro).

I did a simple stitch and added numbers to each pocket. Again, great practice/exposure to print and numbers.

Side 2: The street view! I was really excited about this part of the project, though it required me to learn some new stitching skills which I am clearly still working on perfecting. I wanted to include some places that we go regularly like the grocery store, library, and park. Well ok we don't go to the park regularly, but I know my kids would love it if we did. A long time ago I saw an adorable felt car mat that had a car wash like the one I included. I wish I knew where I saw it so I could give proper credit. I think the car wash might be one of my favorite parts of this mat!

{Clockwise: Grocery store, library, fire station, car wash, park, pond with tree, house.}


Car Mat #2
So because we have twin boys we do everything by twos. I was nervous as I started this project that I would be burned out by the time it came to start the second car mat. Thankfully I wasn't and I think this one turned out even cuter than the first!
Side one: I did the same thing as the first mat, with different colors (the background color is light blue not the white it appears to be).


Side Two: I had a little more confidence in my skills as I started the second mat so I got a little more creative in some of the buildings I included and I love how it turned out!

{Clockwise: Gigi's cupcakes (the boys love this place!), house, townhouse, Lowe's (another favorite place), gas station and hospital}
My two favorite parts of this mat are the gas station with the shoe lace pump.


And the Gigi's Cupcakes which just turned out adorable!


AND
(are you ready for this???)
I made the mats so the roads would intersect (more or less) when placed next to each other. So they combine to make a bigger car mat that the boys can share (wishful thinking?).

{Car mat #2 on the left and #1 on the right}

{Car mat #1 on the left and #2 on the right}
I'll have to add a picture of how they fold up, but this is what they look like when they are folded up. They are secured with a velcro closure with the cars inside.

{Car mat #1 folded up, front}

{Car mat #1 folded up, back}
I am beyond thrilled with how these turned out and while I sewed everything on it would be really simple (and much faster) to make a mat using mostly hot glue.
I just hope my boys love them as much as I do!
(I’m sharing this at the Dare to DIY party hosted by Decor and the Dog, Maybe Matilda, Newly Woodwards, and Two Twenty One!)
Oh my gosh. This is SO cute! I love that you put store names on all the buildings. Great job, this looks fantastic!
ReplyDeleteSuper cute Katy, good job! Too bad I don't live closer to you so you can help me do all these cute things.
ReplyDeleteI was really impressed when you showed me these on Skype, but now I'm even MORE impressed seeing the close-up pictures! These are amazing! I think you're going to have some very busy and happy boys once they get their hands on these.
ReplyDeleteWow! You totally win the award for best homemade boy gifts. This is amazing! I lvoe that Lowe's is included! Thanks for linking all these projects up. I love seeing them.
ReplyDeleteThis is incredible! Thanks for sharing :)
ReplyDeleteThank you for the tips.
ReplyDelete